Showing posts with label Tutorials. Show all posts

Jan 30, 2012

AR 003 - Dog Running

Here is two videos of a dog running. These are good references for a typical quadruped run. Note: Not all quadruped animals run the same as a dog, but these are good starting points. Both videos are in slow motion so you can study the runs.

This dog looks like a Black Labrador. Here are some key notes -
1. Notice the running pattern -
a) The front left paw touches the ground first quickly followed by the right front paw
b) As the front paws are on the ground the back paws are in the air and move forward
c) The dog is off the ground (this is the first time that there is no paws touching the ground) The dog is packed into a small shape (Squash)
d) The right back paw touches first quickly followed by the left back paw.
e) The dog is off the ground (this is the second time that there is no paws touching the ground) The dog is elongated (Stretch)
2. The dog's head remains in a relative same spot.
3. The dog's tail has little movement
4. The dog's ears are moving in secondary action, as well as the fur.


The following video is of a Dachshund. Here are some key notes -
1. They are small dogs with short legs so the spacing and timing is different from the larger dog.
2. Notice that the running pattern is the same and the lager dog.
3. The Dachshund has a longer torso - which shows great squash and stretch.


Jan 24, 2012

Key Tick Color Change for Key Poses (MEL Script)

My buddy Dave Roth, a technical artist, came up with this nice MEL script to change the key ticks on the timeline. This is to separate the major Key Poses from the other key ticks. It's a good idea to visually know exactly what are the Key Poses (Golden Poses) on your timeline so that you can refer to them quickly without having to scrub in the timeline and to look for them.

Side notes: 
1) You can only use one color as the alternate color for the Key Poses (unfortunately). I'm hoping for an update from Dave Roth is the future. 
2) To put the Key Tick from the alternate color back to red, just hit S again on that Key Tick. 

Here is the script and a quick tutorial on how to use it.... enjoy!:


proc SetAlternateColor()
{
colorEditor;
if (`colorEditor -query -result`)
{
float $values[];
$values = `colorEditor -query -rgb`;
displayRGBColor "timeSliderTickDrawSpecial" $values[0] $values[1] $values[2];
}
else
{
error ("You must hit OK to change the alternate color.\n");
}
}
if (`menuItem -q -ex AlternateDivider` == 1)deleteUI AlternateDivider;
if (`menuItem -q -ex AlternateColorMenu` == 1)deleteUI AlternateColorMenu;
if (`menuItem -q -ex AlternateMenuColorPicker` == 1)deleteUI AlternateMenuColorPicker;
if (`menuItem -q -ex AlternateColorToggle` == 1)deleteUI AlternateColorToggle;
menuItem -parent TimeSliderMenu -divider true AlternateDivider;
menuItem -parent TimeSliderMenu -subMenu true -label "Alternate Color" AlternateColorMenu;
menuItem -parent AlternateColorMenu -label "Color Picker" -command "SetAlternateColor();" AlternateMenuColorPicker;
menuItem -parent AlternateColorMenu -label "Alternate Color" -c "keyframe -time `currentTime -q` -tds 1;" AlternateColorToggle;


Jan 16, 2012

How to Create a Story

So you want to create a new story for a short film, a feature film, a book, a comic book or whatever... They're all made the same way. All stories come from the same source. Storytelling goes as far back as history can tell. We as people love stories, we love to hear them, share them, write songs about them and as the years pass on by... create films about them. Stories were used to do many things... but the essence of a story is to give information. Whether we are telling a story about the best place to go hunt. To understand how humans interact, to better understand our God. Stories are vital to our society. Stories bring people closer together and share experiences.

Creating or writing a story isn't as complicated as most people think. All you have to do is come up with a premise, a goal, and ending. That's it! Once you come up with that, fill in the gaps which include; characters, history, plot twists, turning points and other story elements that will keep the story interesting and fresh.

The biggest hurdle for anyone trying to create a new story idea is this: Don't try to think of what people have done in the past. There are many stories that have already be done before and there will be more stories in the future. So dwelling on what has be done will not only slow your progress down, it could stop your creativity altogether. Many people will come to a point when creating their new and original idea and ask themselves,  "hasn't this been done before?".... "isn't this idea just like in that other movie?".... "is this original enough?". These question will derail your efforts in creating a new and amazing story in an instant. So don't ask those questions. Wait until after you did the work. The best thing to do is go ahead and put all your ideas on the table, arrange them into a coherent story, and then later see if your story has similarities to something in the past and if it does change it. Sometimes, you may find yourself nit picking every idea to be original and comparing them too much to past work, that you would miss the fact that your ideas may not be a similar to an old movie as you may think it is.

Here is one big confusion that people have, "Every story has been told"... this is completely false. Not every story has been told, not everything in art has been done. There is no way for anyone to know that, since we cannot see the future and see every possible story in the world. Many people refer to the Monomyth, The Hero's Journey, The Hero with a Thousand Faces created by Joseph Campbell as proof that all stories have been told and are all the same. Should people actually read Campbell's writings and they would understand, it's not that the stories are the same but premises are. We then can conclude that stories are similar because they are  based on premises that are the same.

For example: Say you are with a group of friends, and someone begins to tell a funny story that recently happened to them... and everyone begins to laugh... eventually someone else is reminded of a story that is similar to the first one that was just told... and the laughing continues (hopefully, the second story was as good as the first). What just happened was that a story was told with a particular premise, another story was told with the same premise, but the second story is different. The second story did not have the same people, location, or events as the first, thus making it a new and original story. But I will say this, if two stories that have the same premise, the characters are too similar, the progression of the story is almost exactly them same, and the ending is just a copy... well then, you got yourself two stories, one which is not original... Just like Avatar... but I'm not going to talk about that movie, it will take to long.... moving on...

What are premises?... These are very simple ideas that are straight to the point.  
Boy meets girl and fall in love. 
Monster shark terrorizes beach goers. 
Good guy must stop bad guy to save the world. 
Girl is magically taken to a wonderland.
These are usually very simple to come up with, since they are very common. Once you have this in place you then begin to build on it. This is what is called the story structure. The story structure is made up of different elements which are:

1. Premise - The basic idea for the story
2. Introduction - The beginning of the story
3. Character History - Facts about the character(s) that are important to the character(s) development and story progression.
4. Rising Action - How the story progresses over time
5.Turning Points - Conscious decisions made by the lead character that change the direction of the story
6. Confrontation - The time in the story when the lead character goes to action
7. Plot Twists - Events in the story that reveal important facts in the story's development
8. Conflicts - Distractions in the story that causes the character(s) to develop and to make important decisions
9. Climax - The moment in the story everyone is waiting to see
10. Resolution - The time when everything is finalizing to the end

To learn more about this visit this website: CLICK HERE or CLICK HERE

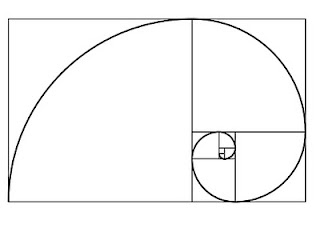
Here is a graph on how all this is laid out.


Once you get all those elements in place you'll see that your story is based on a strong structure that will entertain your audience. Now let's talk about the short film. Short films are anything that is less than 40 minutes long or less. The normal animated short film is normally no more than 10 minutes long. Due the amount of work needed to create an animated short film. The best time for an animated short film should be around 5 minutes long. Ideally, the short film is based around a moral or something that the creator wants to convey to their audience. This makes it not only easier for the creator to begin creating the story, but also will leave an impression in the audience's mind. The short film follows the same story structure as already mentioned. But the story telling is quicker and straight to the point. The goal of the creator when making the short film is to not go over board. To limit all the elements of the story to the basic premise. Should the creator fail in doing this, the audience tends to either be confused or bored... or even both. There are different types of short films. I came up with four categories of short films, which are:

1. THE GOAL
2. THE NON - OBJECTIVE
3. THE JOKE
4. THE ALL OF THE ABOVE


Here are a few examples of these short films. Keep in mind how everything is simple and does not stray from the initial premise.

The Goal - This type of short film is goal oriented. The character(s) has a goal in mind and has to complete it. Whether or not the character(s) complete the goal is part of the story telling. Here is a great example of this, this short is called KIWI


The Non Objective - This type of short film has no "real" goal in mind. It's mostly emotional driven and symbolic. The audience is left to interpret the meaning of the short in his/her own way. This example is called THOUGHT OF YOU


The Joke - This type of short film is dependent on a simple joke or gag. It's usually quick and the shortest of the short films. This is an old example but still funny JURASSIC FART


The All in One - This type of short film uses some or all of the other types of short films. It is usually the longest and the more elaborate. This example is called MEET BUCK


As you can see all these short films follow everything that was mentioned before, with the exception of the NON OBJECTIVE short. Try to stick to what I mentioned in this tutorial and you should have no problem with creating your new and exciting story. I look forward to whatever original ideas you come up with and I hope to see them in the theaters, tv, online, book, comic book or whatever!

Good luck and later animators!!!

Dec 14, 2011

AR 002 - Bear Waving

I came across this funny video of a real bear waving back to some people in a car. I don't know the location of this place, but it is obviously home to the nicest bears around. Don't be fooled by their cuteness though, they rip your face off.


But anyway back to the reference... take notice of the girth and weight of the bear as he gets up. He needs to use energy and force to sit up and wave. So there is a small anticipation just before he sits up. It's small but watch the video a few times and you'll see it. The bear shifts his weight over to the right to balance himself. The balance he needs is for the shift in weight when he raises his paw to wave. Also he leads with his shoulders even though it looks like he is moving his head first. I'll talk more about what I mean by "leads" in a later post.

The bear's front paws roll off the ground onto it's claws before being lifted up. Also his right paw moves first and faster to avoid twinning - which I don't think the bear was thinking about. Which goes to show you that avoiding twinning is a natural movement that all organic creatures inherently do. Of course the principle of timing is all over this and we see a solid slow in when he begins to move and then a smooth slow out with a cushion at the en. I hope this reference will help you in your animations. More to come!

Later Animators!

Nov 30, 2011

Puma Reference Video

I came across this great video of an animal trainer and a puma. The puma is chasing a toy on a stick that the animal trainer is moving around. The puma is incredibly agile and this video shows so many animation principles in action.


Just a few principles and major points in the action I see:

1. Timing is the big thing in this video. The puma is planning ahead on how and when to attack the toy. So his movements are so exact and fluid that when he does jump into the air, he almost floats and the hang time is amazing.
2. As the puma runs and runs up the wall, his body squashes and stretches. It shows how important this principle is and how it makes his body not only look organic and flexible, but it looks strong and muscular.
3. I love how the puma runs up the wall and how it pauses and kicks himself off.
4. The arcs that the puma creates is so smooth. Makes me want to animate a cat.

There are plenty of more things to breakdown and analyze. I watched this video a bunch of times. It also shows that I never want to come across a puma because I might risk getting my face ripped off. Enjoy I hope that this video will help you in your animation. I'll keep a look out for really good references and archive on a new page here on my blog under the REFRENCES, and on my Youtube channels. Click HERE and HERE for my Youtube channels and please subscribe!

Later Animators!

Oct 25, 2011

Back Up Your Work!

Last week my computer stopped working. I don't know why, it happen all of a sudden while I was working on some very important things. So I've been freaking out this whole week, because some work I have been doing for my clients weren't backed up. Let this be a lesson... back all your stuff always. I had to try to use my wife's computer to finish some work but it's not the same. Luckily, I can draw and still continue to create awesome work. Let this be another lesson... do not define yourself by what you use, but by what you can do. A computer is just a tool, a very expensive tool. But with just $10, you can buy yourself some paper, pencils, erasers and a few other things and continue to create masterful artwork. Well, I have to wait to see if I can get my files back and hopefully my computer will work again. But until then, I can stop freaking out, because it's out of my hands. And I can draw until my lead breaks... haha. Well, at least I know I can just sharpen my pencil.

Sep 27, 2011

Animation Book Library

I been asked a lot recently about which books should an animator get for their personal library. So I decided to list them here to help you guys on creating your awesome animation reference library. One thing I want to mention before I create my list... get REAL books. It might be the traditionalist in me, but I feel that there is something about reading from a real book rather than an ebook or pdf. I'm not against ebook, ereaders, and other portable reading devices. I actually like them a lot. But when it comes to reading something that is more important, like reading about your art or a classic book...etc. A real, paper printed book, helps to understand and retain everything you've read. Maybe it's just me, I probably get distracted when I'm trying to read an ebook on my computer but then somehow I end up on Youtube instead. Anyway, here's my list....

To begin, I'll list the top 3 books you should get. And if you don't get any books after these three, then you'll be just fine. That's how powerful these books are!

First and foremost, no Animation Book Library should be without this book. This is THE animation bible...

This is the book that teaches you how animation works from start to finish. Written by Frank Thomas and Ollie Johnston, two of the Nine Old Men at Disney and two of the greatest animators EVER! This book is like reading the soul of animation. Next is...


This book was written by Richard Williams, a great animator and animation director on Who Framed Roger Rabbit. Williams knowledge of animation is amazing! His book is like the instruction manual of animation works. His examples as drawing are perfect for both 2D and 3D animation. And the third top book is....

Written by the classic and incredible animator Preston Blair, who worked on Fantasia and Tom and Jerry cartoons. This book shows how fun animation can be. Blair uses wonderfully classic designed cartoon characters to illustrate how animation works. This book has helped me a lot. It's an extremely easy read and uses the drawings more to teach rather text that tend to over explain.


This book is by the fantastic animator Eric Goldberg. He animated classic characters like the Genie from Aladdin, Phil from Hercules, and Louis the alligator from The Princess and the Frog. I like this book a lot because it's kind of like a blend of The Animator's Survival Kit and Cartoon Animation. It's a short read but with a lot of great information. 


This is book, as the title says, only deals with the timing in animation. Another very easy read, straight forward and to the point. Like Cartoon Animation it uses the images more than text.


This book is a 2 volume book of the lecture series given to the new wave of animators at the Disney studio after the Nine Ole Men retired. Walt Stanchfield, known as the "Other Walt", goes over the principles of animation with gesture drawings and older Disney films. Get both volumes!!!


Written by Tony White, this book is awesome. He talks about how to use principles of 2D animation into 3D.  This is the best book for that type of integration. And this book talks about the video I posted previously.

Another book from Tony White, this book details how to make your own animated films. It shows schedules, budget, and pipeline examples. A great book to have if you plan to create your own short films or feature films.

The first all computer animation book on my list. This book is strictly for Maya users. It acts like a quick reference book, dictionary, or a printed help menu. It doesn't have tutorials like most Maya or computer animation book. Rather, it explains what all the tools and menu option do in Maya. It's not to think so it's easy to carry around. 

This is a great animation book for Maya. It is one the only books out there that the subject is about animation in computer animation. Most books would have a chapter or two on animation and then move on to another aspect of Maya like modeling or texturing. This is only about animation. Eric Luhta has some great tutorials in here!

And lastly, Dream Worlds by Hans Bacher. Bacher was the production designer and layout artist for films such as Mulan, Lion King, Hercules and Aladdin. This book teaches about how to create the feel of the film through composition and camera angles, color and light, and story telling. It's one my favorites. 

There are plenty of other books out there, that will be great additions to your personal library. But I feel that these are the ones you can live without. Especially if you focus mainly on animation both in 2D and 3D. I hope this helps and if any you have questions, please leave a comment or email me! 

Later animators!

Sep 19, 2011

Very Basic Walk Cycle Tutorial

Hi everyone, please enjoy this tutorial. Like this title says, it's a very simple walk cycle tutorial. Nothing fancy or too complicated. I'm not focusing on creating and character or personality driven animation, just a simple walk. Basically, this is a very, very basic walk cycle. ENJOY!

Jul 13, 2011

Check Your Animation Silhouettes

In this tutorial, I want to talk about how to review and critique your animation using silhouette. You may have heard many times that silhouettes are extremely important in art and animation. As I mentioned before in a previous post (Which you can read HERE), silhouettes help in more than making a clear pose. It helps in the over all animation, framing and composition of you animation.

So in the animation below, I created a character doing a back flip and running towards his attackers with a spike in hand. The animation isn't 100% complete, but it looks pretty good as it is so far. I began like I normally do, by blocking out, then adding timing, and refining. Now I want to check the animation. So I make a playblast and watch it over and over again at different parts of the body. I'm looking for any mistakes or anything I can change. However, whenever you look at an animation, especially 3D animation, you might get distracted by other things. In this example, the shading and the details of the character could distract you from the over all quality of the animation. It's not a big distraction, but none the less it's a distraction. What you want to focus on is the composition of the poses. Looking at the silhouettes will allow you to view the animation undisturbed.


To do this all you have to do is.... wait for it... PRESS 7! Yes, that's it pressing 7 turns on the lights in Maya that you have created. If there are no lights in the scene then all the objects turn black. Which, look like silhouettes. So doing this makes it easier to view the action in form, shapes and more importantly, silhouettes.


I hope this helps you in refining your animation further and touch up the smallest details. Remember that in animation, the smallest details or a change on one frame make a world of difference.

Later animators!!!

Jun 11, 2011

Suspension of Disbelief - Part 1

I came across this video on a posting over at Cartoon Brew. In which it talks about physics in animation for Dreamworks Studio and that it's being taught at San Jose State by professor Alejandro Garcia. Watch the video below:


At first, some may think... "oh this make sense". But there's a problem... CARTOONS AND ANIMATION ARE NOT PART OF THE REAL WORLD! Let me calm down for a second....

I couldn't disagree more with what was said in this video. I especially disagree with what animator, Cassidy Curtis at minute 1:03, "When something doesn't feel like it is physically capable of happening it pops the audience out of the moment, it reminds them what they are watching isn't real". This is completely false. Maybe that is his preference, but I don't need to believe that something needs to look real for me to believe it or keep me in the film. And neither does the rest of the world. After all, animators have been keeping audiences in the films for many many years! We do not go to the movies to see something real, we want to be taken away into a fantasy, where our imaginations can run wild without the limitations of physics.

I agree that having a better understanding of physics will help the animation look better. Especially if you bend and break those rules to make it more amazing. But the problem is that cartoons are cartoons. They are not part of the real world. I find it funny that so much importance is put into making animation look more real, instead of allowing the animator to be artistic and creative. The argument isn't how to make animation look "real" but how to make animation look natural. What I mean by natural is; every cartoon or animated character has a specific anatomy to how they were designed and created in their universe. They will move and behave accordingly. For example... Spongebob Squarepants, nothing in this world has his anatomy. Nothing moves and behaves as he does in the cartoon world. So the animators have to create new "rules of physics" that apply to him in his world, while keeping in mind that his movements look natural to his anatomy.

Whatever happened to Suspension of Disbelief? Why does everything now have to be overly explained so that it makes "sense". No one questioned anything that Wile E. Coyote did that defied all laws of physics.


There are cases when real world physics do not and can not apply to animation. For example, Art Babbitt's angry walk. The human anatomy does not work the way Art Babbitt animated that walk. But it looks right and awesome.
Here is an example that someone did of Art Babbitt's angry walk, which was taken from Richard William's Animator's Survival Kit book:


Squash and Stretch and smearing inbetweens does not happen in real life as it does in cartoons. But in animation, it's brilliant! In the end try not to over think every little thing, animation is an artistic medium, not everything will be perfect. Perfection is in the imperfection. To prove my point... here is one of my favorite scenes from Disney's Aladdin. The Genie singing "You Never had a Friend Like Me"! The Genie breaks all the real world physic's rules.

Mar 24, 2011

Animators Are Not Actors - Part 3

This is the third post about how I feel animators are not actors. Click here and here for the other two posts. But before I continue, let me briefly make it clear what I mean about that animators are not actors.

Like mentioned before in the other two posts, I believe that their needs to be a clear distinction between an animator and actor. We need to understand how actors work but we should never think that we are the best and only acting resource!

To continue this lesson, I recently found an article from Vanity Fair. Photographer Howard Schatz took pictures of actors playing different roles. In each image, the actors play a role and in each image you can clearly see what it is they are performing. This is a great example of how we as animators can use many, many different resources for our animations. I made some facial expressions with the Norman rig and a few of the images from that article. You can see the article yourself here.


Whenever you work on your animations use the abundant amount of references provided by world class actors. They can and will give you a great insight into character performance.

Later Animators!

Here are the links to the continuation of this topic
Part 1
Part 2
Part 4
Part 5

Feb 10, 2011

Animators Are Not Actors! Part 2

I don't want to go over the what I've already talked about in part one of this topic. If you go back and read the Animators are not Actors tutorial, it will explain more about what I'm talking about.

But I recently came across this video on the new movie Rango, coming out this year. The movie looks interesting and quirky. So I'm interested in seeing it. But this video made me more hyped up to go see it. The reason is because, it's a behind the scene look on how the animators working on this film are doing things right! They are using real live actors (the voice actors) as reference for the animation. It's not mocap, maybe a little rotoscoping here and there. But what the animators are doing is using the actors talents and skills to enhance the animation. They are even taking the actors mannerisms and putting them into the animated characters. It's a great way to get more personality and better acting. Here's the video:


I'm not saying this hasn't been done in other studios before or recently, but a lot animators are relying a little too much on their own "acting" skills for the animation. The idea here is to get the best results for the final animation. Disney used actors as reference footage heavily in their films. For example, watch these videos:


This is a tried and true technique for animating characters with personality, emotion, and real performance. It's good habit to get into and a way to push the character animation to the highest potential. If you don't have access to a great actor like Johnny Depp to make reference video for you. You can always search the internet for clips of movies, tv shows, stage performances, operas, concert, sports clips, anything and use those references along with videos of yourself acting the part as well. The more information and resources for your animation the better.

Later animators!


Here are the links to the continuation of this topic
Part 1
Part 3
Part 4
Part 5

Feb 8, 2011

Rule of Third and The Golden Rectangle

The Rule of Thirds is something that artists, directors, cinematographers, photographers and animators use to better compose a shot or art piece. It not so much a rule but more like guidelines than actual rules. Ha ha – that last part was taken from Pirates of the Caribbean. What the Rule of Thirds do for the composition is that helps make the piece more interesting and balanced. The idea is not to compose your subject or the object of interest in the direct center of the frame or canvas. Putting your objects in the center all the time in boring and ineffective. That's not to say for certain shots you can't center the object at all. Just not all the time. It's like 95% Rule of Third and 5% center frame... more or less. I'm not a full believer in the “rules are meant to be broken” idea. I do believe that rules are meant to bend. So like I said, not every shot should be based on the Rule of Thirds composition. There are however other ways to set up shots compositions, which we'll talk about later. But first more on the Rule of Thirds.

To create a Rule of Thirds composition is by breaking an image down into thirds both horizontally in three parts and vertically into three parts. So in the end you have a tic tac toe grid. Like the image bellow:

With this made, which would apply to any framing composition, the center of interests are clearly defined. This means that the horizontal, vertical lines the spaces above, below, to the left and to the right of those lines, and the intersecting lines are where you actors, subjects, or objects should lie on. Here are some examples:


There's a nice video on Youtube that explains this:


But that's not all, there are two other main composition guides. The Golden Rectangle and the Golden Triangles. These provide even more interest to your composition.

The Golden Rectangle which look like this:

The Golden Rectangle is traditionally how all art work (this includes painting, sculptures, architecture...etc) is composed and constructed. The Golden Rectangle or the Divine Rectangle has been around forever. It's in all of nature. I'll go more into the history and the function of the Golden Rectangle later in a drawing tutorial.

But as you can see the Golden Rectangle also creates a spiral than continues forever. But the composition is basically the image above. It is used to have the objects of interest follow the flow of this spiral or fit on the lines created by the Golden Rectangle. Like the image below:

The Golden Triangle follows the same idea as the Golden Rectangle. Which looks like this:


This helps with composition as much as the other two. This allows you to break from the horizontal and move to another way of viewing the world.

There's a fantastic book called Dream Worlds: Production Design for Animation by Hans Bacher

This book is wonderful. Not only does it have amazing artwork from some of the best Disney animated films, but Hans talks about how to layout and compose a shot. This book has a lot of great insight and information that is invaluable! Get it!!!

There's an unnecessary debate about the Rule of Thirds vs The Golden Rectangle vs The Golden Triangle. Some people argue one is better the others. Others say that the Rule of Thirds is old, lazy, cliché, and should be phased out. This argument is pointless and dumb. The composition you choose should be your choice and effective for your story. If you choose any of the three compositions or come up with your own, and it helps your work, THEN SO BE IT! You decide, but understand that you need to know how composition works, and how to be clear in your storytelling to make the right decision.

So why bother doing any of this. Well for many reasons, but one main reason, and a very important one, is that we naturally move our eyes around things we are looking at. We do not keep our eyes fixed on one spot the whole time. Even if you try to look and stare at single spot you can feel and see your eyes moving around. So knowing this, we can compose our framing to use the entire composition to our advantage and properly tell our story.

Feb 6, 2011

Quick Select Sets

Quick Select Sets are normally used during rigging setup of a character. However it is very useful as sort of a replacement of character sets. Like I said in the character sets tutorial – I'm not a big fan of character sets. They have their functions and can be very useful. I don't think that Autodesk should get rid of them, but they're not my thing.

Before we begin, let's talk about what a Quick Select Set is. A Quick Select Set is normally helpful for technical artists to create a character rig. They are used when the technical artist have many objects in the scene and needs to group them in without actually grouping. Basically it's a way to select one or more objects quickly and then do whatever you need to from there.

So how does this help the animator. As said before Quick Select Sets can be considered as a “replacement” for Character Sets. The reason we would even want to replace Character Sets is because that they can cause some confusion for the animator if not used properly. Read this tutorial more about Character Sets. Also Quick Select Sets are helpful for animators because they are easier to use and modify.

To create a Quick Select Set do the following:

1. Select the controllers that you want to belong to a Quick Select Set. Note: Make sure to select one controller at a time while holding shift. Do not make a selection by clicking and dragging a square selection over the controllers. Because if you are using FK controllers you might not select all the controllers


2. Go to Edit > Sets > Quick Select Sets


3. A small window will appear where you can name the Quick Select Set. Once you name it click on “Add to Shelf”.


4. An icon will be added to your shelf. This is your new Quick Select Set. You can now change the icon image to your own custom image.


You can make as many Quick Select Sets as you want. I normally recommend to do one for the whole body. This way you can animate and pose your character, then click on the Quick Select Set and set a key. This can greatly keep your time line clean from too many key ticks. Or if you make a Quick Select Set for the torso, arms, legs,...etc, then you can organize the key ticks and manipulate them separately. Similar to the Character Sets.

And that's it! It's very simple but it's a great tool for animation. Normally the best tools are the simple ones!

See you later animators!

Oct 6, 2010

Acting Tips!

So in a previous post, I talked about how animators are not actors. But like I said, that as animators, we should not rely only on our ability to act out a scene. But also use a real actor's performance or at least their technique in our animation to get the fullness of the performance we create. This video is an awesome example of how we animators need to learn from actors and observe them. The great Michael Caine shares some of his techniques...


Here's another...


Just a few good tips to keep in mind for your next animation. So remember, the best performance you can achieve for you character is to do the following:

1. Story board it - Always plan out the sequence
2. Draw thumbnails - This frees you to create natural, free flowing poses with committing to single key frame
3. Act it out yourself (video record it) - Get up out of your chair and move. Take note of how your body feels as you act the sequence
4. Look for other references (Actors) - Use the people who make careers out of acting to really know how it should be done.
5. Repeat! - Do it again and again until it becomes second nature.

Jun 29, 2010

Careful with your Silhouettes!

Many new animators can make the mistake of forgetting about the silhouettes. And it can be a simple mistake that was overlooked. For example, check out this:


This is obviously from the new movie Knight and Day with Tom Cruise and Cameron Diaz. What happened to Tom Cruise in this movie? Did he lose a leg? Is this a war movie or pirate movie? And I don't even want to guess what's between Cameron Diaz's legs! Lol! All kidding aside, the silhouettes here do not work. They were clearly going for a 60's James Bond type poster but did not achieve it. This is more like it:

You can see two silhouettes, one of James Bond which in a medium shot and the second is of a sexy woman holding a gun. Even though the woman's silhouette has a little more detail, it's still a silhouette.

But this is a mistake that can be avoided. First, let talk about why the silhouette is important.

The Silhouette
The silhouette helps in many ways to improve your animation. The main thing it does, is enhance your poses. As we all know, poses is one of the elements that makes great animation. It's what tells the story, delivers the idea, and expresses the emotions and thoughts.

It establishes staging, framing and layout. Silhouettes are not only used for characters, but also scenery and props.

The silhouette also helps in design. A great character design is recognized instantly. And this is proven by looking solely at the silhouette. Look at these examples:

I'm sure everyone can figure out who these characters are. But silhouettes do not only apply to cartoon characters:


The last on is my favorite. ALFRED HITCHCOCK IS THE MAN!!!

On the documentary, "Frank and Ollie", (which is about two of the Nine Old Men, Frank Thomas and Ollie Johnston) Frank and Ollie were acting scenes they had worked on over the years at Disney. As they did so, they were in a empty white room with a light pointing at them which casted a shadow on the wall. Nothing was really said about what they were doing, but I realized that they did their acting in this room to see their silhouettes. They didn't want to be distracted by their own faces or anything else. At this stage they just wanted to see the shape of the body for their key poses. This is in contrast to what some of the Pixar animators do on the DVD special features. On the special features of Monsters Inc. DVD, one animator is acting and filming himself in front of a large mirror. He acts out a scene and then uses this to animate. When you look in the mirror, you immediately look to your face and eyes. You see less of the shape your body makes. This also applies to recording yourself on video. This is not a bad thing to do and I'm not saying that what they are doing is wrong, but what Frank and Ollie did, made more sense. They are focusing on the silhouettes, on the shapes, and on the poses! This will vastly improve your animation. In my opinion, Frank's and Ollie's animation is far superior to anything done today.

So how can I avoid making bad silhouettes in my animation? Easy just do the following:

1. Gesture Drawings - DRAW!!!!! I can't express how important this is to your animation.

2. Gather References - The silhouettes I used in this post I found on Google. I just typed silhouette and found all this.

3. Make your own references - If you can't find the silhouette you want from the internet. Take pictures, go to Photoshop and make it into a silhouette.

4. Establish your camera - Whenever you begin a new scene, it's always a good idea to set up your camera first. Also, you may want to animate the camera ahead of time so that you animate to the camera. This is in part of creating proper staging for your scenes.

5. Black Shader - Make a new shader and change the color completely to black. Apply it to your character and animate. What you'll see is a 3D silhouette. Use your perspective view to view all angles and make sure the silhouette works, even though you are using one camera to identify the best pose and silhouette. You may want to switch back and forth between the black shader and a normal shader, just to see how your progress is going.

You always need to make sure that, you as an artist, are not relying too much on the computer. The computer is just a tool to create your work. But there are a multitude of resources that will help you improve as a 3d artist. As an artist look to improve your work by taking a step back. If you like to create CG models buy some clay and sculpt. If you like to rig, take anatomy drawing classes. Walt Disney said; "Keep one foot in the past, one in the future". Happy Animating!!!

May 13, 2010

Animators are NOT Actors! They're Animators! Part 1

Animators are not actors. We are animators! I know that they are many books and websites out there that say the opposite. But, I believe that there is a misconception of this idea. So let me clarify what I mean.

Yes, as an animator we use theater, staging, and film techniques as we produce believable and dramatic character animation. We as animators should study throughly these techniques to become better animators. Animators have to become a variety of different characters, from cars, dinosaurs, people, animals, etc. So this said, in the argument whether or not an animator is an actor, then I would say 'yes'.

However, and this is a big "HOWEVER", animators are not classically trained to be an actor. Animators are trained to be animators. The actor follow certain skills and techniques to bring out their best performance in their art form. The actor uses techniques such as Method acting, Stanislavski acting, Brecht acting, Artaud acting, Meisner acting, to name a few. Most of these techniques do not and will not apply to the animator. Acting is a brilliant art form and done correctly, will entrance the audience.

Does this mean that as animator we should abandon the idea of using acting techniques? Of course not! What it means is that, we should not assume that we are the only source of acting reference. We should not just record ourselves on video and rely on how we act to bring the character performance on the screen. This is a very common technique used by animators to capture the acting reference they will use in their scenes. I believe that this technique should not be used for acting but rather to see how the body moves, changes weight and balance, and observe the line of action. What we need to do as an animator is to understand what the character is thinking and why is he doing it. This is a tip from Frank Thomas and Ollie Johnston. Two of the very best animators of all time. Another tip from a great animator, Keith Lango, is when he said that character animation (acting) is the internal motivation expressed externally.

If we were to define animators as anything else, it would be an observer. One of the Disney's Nine Old Men, Ward Kimball called himself an observer when asked about how he animates. He said that he must carefully take note of the world around him to make the animation he creates believable. Obviously he animated with acting techniques to bring out the personality and emotion of the characters, but he needed to understand how his character would move and behave in real life first.

So my tip for all animators out there for animating scene that require acting is the following:

1. Review the script many times.
- Get an really good understanding of what the mood is and what the emotional thought process of the character(s). You need to know who your character is, what he is thinking, and what drives his actions

2. Thumbnail it!
- Draw, Draw, DRAW!!! I can't express how important drawing is, even for 3D animators. Drawing helps you understand many things for example; weight, balance, where to put things, and how the body works.

3. Record yourself.
- Like I said before, this is not for acting but to see how the body works, to see timing, and a little acting.

4. Get and actor.
- Look for an actor to help you with acting. Record the actor doing the scene. If you get a really good and trained actor, your job will be a whole lot easier.

5. Look for references.
- If you can't get a hold of an actor, then the next best thing is to go to your local video store, Netflix, youtube, or library and get movies that have scenes that could help you. If you are animating an intimidating character use Robert de Niro in Taxi Driver. If you're animating a clown, use Jim Carrey in Ace Ventura.

I feel that a majority of the animated films take the "animator is an actor" idea too far. The result is an overacting, spazzy, and way too exaggerated performance. I'm not going to name which films have this or where they learned this, but it is something that schools and virtual schools should consider explaining a little more to their animation students. So don't rely only on what you can do as an animator. Look out to the world around you and gather all the available information you can to make your animation the best you can create. So go have fun animating!!


Here are the links to the continuation of this topic
Part 2
Part 3
Part 4
Part 5

May 9, 2010

Realistic Animation vs Natural Animation

This tutorial primarily applies to character animation....


So what do I mean by realistic animation vs natural animation?

A lot of novice animators come across a simple problem and turn it into a huge waste of time. The problem is that the novice animator is trying so hard to make his animation look real. They'll send countless hours trying to make their character move like a real person. The novice animator will look at other animation and try to figure out why those move so real.

The reality is that animation is not supposed to move real or realistically. But rather, the are supposed to move naturally. Naturally means that characters from every genre and medium are designed in different ways and styles. Each character has their own "anatomy". Therefore, their bodies will behave and move uniquely.

Example:
The Disney-Pixar movie CARS, everyone believed and accepted each character as an individual. They were able to act and carry a story. But, not one of the characters ever moved realistically. After all, real cars do not talk, crack jokes, or fall in love. Real cars have no personality, no emotions, they do not have faces! Cars a soulless machines meant to transport us from point A to point B. So the animators had to study and experiment with animation on ways to make the cars feel like they are naturally behaving as cars would if they could talk, crack jokes and fall in love.

If the character is an anthropomorphic bear who plays soccer. Then the bear should be animated to those specifications. In order to achieve the natural animation for this character, you need to do some research. Ask yourself question and research the answers. It should be something like this:
1) How do soccer players run and play?
2) What type of soccer player is he? Is he bad, good or great?
3) What position does he play?
4) How long has he played soccer?
5) Is he a team player or is he a ball hog?
6) How heavy is he?
7) What type of bear is he?
8) Where is his center of gravity?
9) How would his anatomy be?
10) Is he always on two feet or occasionally?

Another example:
Disney's Lady and the Tramp, a classic film. The following scene is the most famous in the film in any film really. Here we can clearly see how the animators asked themselves questions similar to those above. They researched how dogs move and behave. They experimented on how to incorporate human emotions onto dog faces. And as you can see, dogs move in and out from human characters to dog characters so smoothly it feel and is natural. Here is the clip:


So when you animate, do not try to make it animate the characters like a realistic person. But, animate them to move naturally to what their character design, anatomy, and personality allows them to move. If you want something realistic... film it! But don't use motion capture! That is evil!

Apr 26, 2010

The Anatomy of the Walk Part 1

The Anatomy of the Walk

The Walk is probably the most important animation an animator must master. Every person in the world has their own specific walk. A walk can show mood, emotion, personality and more. Every animation student should have a copy of “Cartoon Animation” by Preston Blair - a book that’s trained countless animators over the decades. Here’s a sample page to give you a taste:


This is a perfect example of not just understanding the anatomy of a walk, but also planning out the animation before creating a single frame. With the image above, one could easily set out the framing rate by studying the speed of the movements.

For example:

The walk could be timed out on a frame rate of 6s or 8s

The run, since it's faster than the walk could be timed out on 4s or 6s

The tip toe's frame rate is slower than both the walk and run, so it can be on 12s or 16s

But the frame rate depends on with the characters are doing and how it fits into the animation sequence.

ANATOMY OF A WALK

Walks are very complex. Not only do the feet have to move across the ground, but the hips, spine, arms, shoulders and head all move in sync to maintain balance in the system. As mentioned in the book “The Animator's Survival Kit” By Richard Williams, a walk is a controlled fall. As we move forward into a walk we unknowingly allow gravity to assist us. Our body move or lean in the direction we are headed towards. The further the lean the faster we are moving. This is called the Balance/Tilt Line. As we allow our bodies to fall and gravity take over, we quickly place our foot in front of our bodies and stop us from hitting the floor. The faster we do this the faster we are moving. Though complex, if you break down each of these movements joint by joint, the mechanics of walking become clear. And mastering the walk is vital to any animator's arsenal of tools for creating believable and natural character animation. The main poses for the walk are:

Contact

Recoil

Passing

High – Point

These poses are the Key and Extreme Poses. These are the poses that are to be seen longer by the audience and will relate the emotion and personality of the characters. Some animators think that the recoil and high points are the most important poses because the head is at its highest and lowest positions. This is wrong. The contact pose is the fundamental building block of a walk cycle. If you do not start your cycle with this pose, then you are doomed. It’s as simple as that. Let’s break down a basic walk, step by step.


THE FEET AND LEGS


The feet and legs propel the body forward. To keep your character looking natural, you should always keep the joints bent slightly, even at full leg extension. Try not to straighten out any limb. The reason for this, is because as the animation plays it may result in a visible pop on those limbs. The walk usually starts with the feet at the extended position – where the feet are furthest apart. This is the point where the character’s weight shifts to the forward foot. As the weight of the body is transferred to the forward foot, the knee bends to absorb the shock. This is called the recoil position, and is the lowest point in the walk. This is halfway through the first step. As the character moves forward, the knee straightens out and lifts the body it’s highest point. This is called the passing position because this is where the free foot passes the supporting leg. As the character moves forward, the weight-bearing foot lifts off the ground at the heel, transmitting the force at the ball of the foot. This is where the body starts to fall forward. The free foot swings forward like a pendulum to catch the ground. The free leg makes contact. This is exactly half the cycle. The second half is an exact mirror of the first. If it differs, the character may appear to limp.


THE HIPS, SPINE & SHOULDERS


The body’s center of gravity is at the hips -- all balance starts there, as does the rest of the body’s motion. During a walk, it’s best to think of the hips’ motion as two separate, overlapping rotations. First, the hips rotate along the axis of the spine, forward and back with the legs. If the right leg is forward, the right hip is rotated forward as well. Second, at the passing position, the free leg pulls the hip out of center, forcing the hips to rock from side to side. These two motions are then transmitted through the spine to the shoulders, which mirror the hips to maintain balance.

When the feet are fully extended, the hips must rotate along the axis of the spine. To keep balance, the shoulders swing in the opposite direction. From the front, the spine is relatively straight, but from the top, you can see how the hips and shoulders twist in opposite directions to maintain balance. At the passing position, the front view shows the hip being pulled out of center by the weight of the free leg. This causes a counter-rotation in the shoulders. From the top, however, the hips and shoulders are nearly equal angles. At the extension of the second leg, the hips and shoulders again are flat when viewed from the front. From the top, however, you can see the rotation of the hips and shoulders has completed.


THE ARMS


Unless the character is using it’s arms, they’ll generally hang loose at the sides. In this case, they generally act like pendulums, dragging a few frames behind the hips and shoulders. Even at full extension, try keeping the arms slightly bent at the elbows. This will keep them looking natural.


THE HEAD


In a standard walk, the head generally tries to stay level, with the eyes focused on where the character is going. It will then bob around slightly to stay balanced. If a character is excited, this bobbing will be more pronounced. The head may also hang low for a sad character, or may look around if the scene requires it.


Check Up


After completing the basic animation movements and poses as mentioned above, always double check your work . Here are some tips:

1. When the right foot is forward, the right arm is back, and vice versa. This is called “counterpose”. This is how nature keeps everything in balance when you move: one side of the body “opposes” the other. Good animation has these “opposing actions” all the time. If animation seems weak or unnatural to you, it is frequently because it lack opposing action.

2. Check the inbetweens (overlapping animation, follow-through, secondary action).

Once completed, this basic walk can be adjusted to create a walk with personality. This is achieved by going over the Key and Extreme poses and changing them to adhere to the character's personality. Or by redoing the entire tutorial and adding those personality traits in the walk at the moment of creation.

What I have provided for you is a start. I know that in this tutorial there was practically no images or video to assist you, aside from the first one. I will elaborate more on this tutorial with images and video, but try to follow as is first to get the basic idea. Also, this tutorial covers a walk for beginners. I will show you different ways or techniques of achieving the same goal. So in other words, this tutorial is not telling the exact way of animating a walk cycle. It is just informing you the fundamental principles and basic understanding of the walk cycle.

This is just a basic over view of the walk. I'll go over more about the walk in following tutorials.